
As I love taking photos and capturing our family memories, I had to come up with a way to display them rather than just dumping them on my laptop. At last count I had over 39,000 photos stored on there!
I do have my Facebook albums and of course I share snaps on my Instagram but I don't always share our most personal photos, those awkward ones with someone's eyes closed or the photos that mean the most to us but not necessarily anyone else. Plus nothing beats flicking through a photo book and reliving the memories of wonderful holidays and special occasions.

I used to do photo albums but they were taking up so much space and I just got out of the habit of printing photos out. I had wanted to do photo books for a while but hadn't found the right site that was affordable, easy to use and would let me have a say in the design and layout.


Then I came across a sale on the Big W photo site and decided to give it a go. I was so happy with the result and shared them on my Instagram story. I received lots of questions on which design I had used, what size they were etc so I'm sharing all the details here in case you would like to make up some photo books too!
Here's how you do it.......
Go to Big W Photo site here
Go to the Photo Book category and select Hard Cover Books
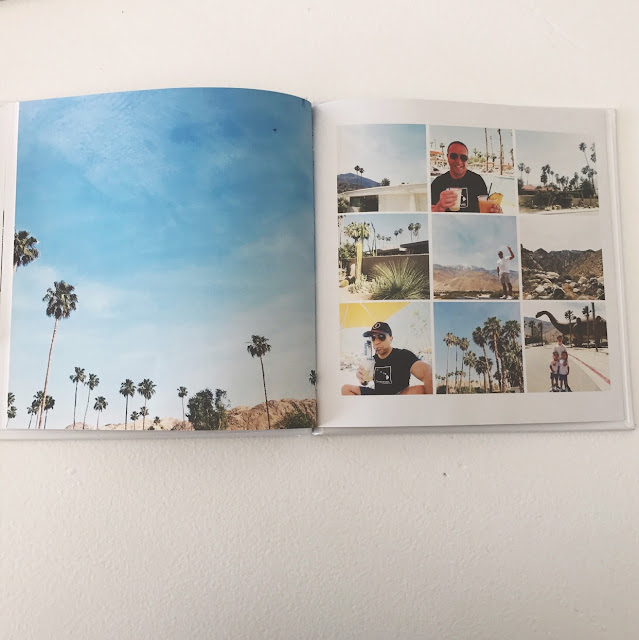
I go for the 8 x 8 inch personalised hard cover book but there are lots of different ones to choose from. It depends on which size you prefer, where you're going to store them etc.
I like the "Calm Neutrals" design as I can make it all white and then my photos can stand out and become the feature.


Now it's time to upload your photos. It helps to have them all sorted and edited and ready to go before uploading them. It is recommended you choose up to 88 photos for your photo book.


Once you have uploaded your photos, click on select all and then continue.
I choose to create my own photo book using the option on the right hand side. This way the book will have a basic lay out but I get to choose where I position my photos. This way I can use my favourite photos to take up a whole page, I can put things in a sequence or group similar things together.


It will then bring you to this stage.....

To make my photo book white and all the backgrounds white, I go to the "Background" tab and choose the Neutral Mono Solids and click and drag the white to cover the background. It ends up looking like this....

I then add one of my favourite photos to the Front Cover, another pic on the back and add some text to label the photo book. You can move the text around but I like it down the bottom under the photo.

Use the arrows to move to the next pages and click and drag the white background to these pages too. It will then ask if you would like all backgrounds white, click on it.
This page is usually where I add a few photos to give a "taste" of what the photo book holds.
I also add text here if there was more than one event, or we visited various places.

I don't like the beige squares so to get rid of them, click on them, go to edit and delete them.
This is where I then add my text describing what is in the book/on the page.


As you move through the photo book, you can drag your photos to the position you like. I don't like the borders around my photos so I go to the "Border" tab, click on remove border, drag it to the frame and you will get the option to remove all of the borders.


Then the fun starts moving photos into sequences and stories and giving your favourite photos prominent space. Sometimes I add text to the pages if I want to note a particular moment.
Once you have added all of your photos and finished the lay out for the 20 pages click continue, you can then choose how many copies of your photo book you would like and add it to your cart.
For Christmas I usually do up a photo book of the boys and do 3 copies for each set of grandparents.
I have also set up my own account so I can name my photo book projects and save them so I can have a record of the ones I've completed.
You can then continue shopping and start another photo book if needed.
I hope that has explained how I do my photo books. The Big W online layout is quite simple and easy to follow. Just follow the steps and instructions. Play around with the best design, text for you.
My tips for getting a great looking photo book is to just make the backgrounds white so your photos stand out. Also vary your photos so you have portraits of people, snapshots of your surroundings, food shots etc. I just think it looks more interesting and attractive.

Other tips for doing your photo books are -
My tips for getting a great looking photo book is to just make the backgrounds white so your photos stand out. Also vary your photos so you have portraits of people, snapshots of your surroundings, food shots etc. I just think it looks more interesting and attractive.


Other tips for doing your photo books are -
* Get your photos organised and in order before you begin.
I have a series of folders on my laptop that I file my photos in once they have been edited. This keeps everything in one place and isn't so overwhelming as going through the thousands on my laptop.
As I take most of my photos on my phone, I always download them and back them up on my laptop.
I 've gotten into the habit of filing them immediately after doing this. It saves time in the long run.

*Know that it is going to take a while and mark out some time in the day to do this where you won't be interrupted as it will just take longer. I usually do it once the kids are in bed or on the days Noah is at kindy and the boys at school.
*Make sure your photos are as clear and bright as possible for good results. Mine have all been taken on my phone and filtered, and they still come up a treat. If you get a low resolution warning in your photo book see if you can edit your photo to be clearer/lighter. Although I have had a few low resolution warnings and decided to go ahead anyway and they've been fine. Use your own judgement.
*Keep an eye out for sales, especially if you want to do a few photo books at the same time. Big W has sales frequently and I always try to snap up a few books when they're priced at $15. It makes a big saving when you're doing a large amount or if you want to do some for gifts etc.
*Choose your photo book size correctly. I love the 8 x 8 as it is large enough for the photos to be a good size through out the book but not take up too much space on my bookcase. They are also easy to pass around, not too heavy. ( I keep mine on my bookcase in the lounge room)


I think that is all my info, if there is anything I've forgotten to add or you would like to know just leave me a comment and I'll get back to you.
It's one of those projects that you tend to put off as it seems so time consuming but once you get into it, it's really satisfying and our whole family love to flick through them and relive the memories.


Looks amazing! Now I need to go on a holiday so I can do one ;)
ReplyDeleteAre you able to please tell me what program/s you use for editing photos from your iPhone? All your photos look amazing! X